- Netgate Blog: DNS over TLS with pfSense
- http://dnssec.donnerhacke.de/
- https://www.kuketz-blog.de/empfehlungsecke/#dns
- https://www.heise.de/newsticker/meldung/Quad9-Datenschutzfreundliche-Alternative-zum-Google-DNS-3890741.html
Since AnyDesk is not willing or able to provide a list with the IP adresses of their relay hosts and I wanted to test how URL table aliases in pfSense are working I have built this nobrainoneliner which I call via cron every ten minutes.
#!/bin/bash

# Variables
ANYDESKRELAYHOSTSFILE="filename.txt";
WEBDIR="/path/to/the/directory/where/the/file/is/stored";

# Here the magic happens
dig +noall +answer relays.net.anydesk.com | awk '{print $5}' > $WEBDIR/$ANYDESKRELAYHOSTSFILE;
exit 0;
I just had to set up a simple site to site VPN between a site with a fixed IP (SITE-B) and a site with a dynamic IP (SITE-A). Both routers are running the ‘Community Edition’ of pfSense and are installed on PC Engines APU.1C4. I have followed the documentation at pfSense.org about how to configure a Site To Site VPN with OpenVPN to get the VPN up and running. Because some things aren’t documented there I will put up my own HowTo here. Please do yourself a favour and read the documentation at pfsense.org first because it explains things in more detail than I will do here.
This HowTo will guide you trough the setup of:
Sources:
You should now be forwarded to the list with your configured OpenVPN servers under ‘VPN – OpenVPN‘ on the ‘Servers‘-tab
Go back to SITE-B router. If you haven’t left the window open, navigate to ‘VPN – OpenVPN‘ and select the ‘Servers‘-tab, click on the ‘Edit‘-button (the pencil) next to the server you have created earlier
Return to SITE-A OpenVPN client configuration
You will get a list of Interfaces which has a dropdown at the bottom end which is labeled ‘Available network ports‘
This will add a new Interface named ‘OPT<number>‘ to the list
This will open up the configuration for the interface which you have assigned to the OpenVPN server on SITE-B.
You will get a list of Interfaces which has a dropdown at the bottom end which is labeled ‘Available network ports‘
This will add a new Interface named ‘OPT<number>‘ to the list
This will open up the configuration for the interface which you have assigned to the OpenVPN server on SITE-B.
Now, to allow traffic to the OpenVPN server, a rule has to be added to the firewall on SITE-B router .
Then add a firewall rule to allow traffic to pass through the tunnel.
On SITE-A router a firewall rule to allow traffic to pass through the tunnel has to be added.
This information is outdated. I have done a fresh install on a new device with 2.2.3 and now you have to use the installer. Boot from a USB-stick, press “I” during bootup to invoke the installer and just walk through the installation process.
I have had some troubles to install pfSense on the new PC Engines APU.1C4. I have tried to dd the image directly to the mSATA-disk and somehow managed to wreck the BSD-disklabel by doing this.
The pfSense installer was then throwing messages like the following, stopped and threw me back to a shell.
Jul 19 10:29:17 pfsense kernel: GEOM: da1: geometry does not match label (16h,63s != 255h,63s).
I’ve been able to fix that by low level formatting the mSATA disk with the HDD LLF Low Level Formatting Tool (needs Windows) which I have found here. It did not help to just delete the partitions with gparted or fdisk or to partition and format the mSATA-disk with Windows.
First you have to unpack the image-file.
gunzip ./pfSense-memstick-serial-2.1.4-RELEASE-amd64.img.gz
Then dd the image to the USB-stick
dd if=/path/to/pfSense-memstick-serial-2.1.4-RELEASE-amd64.img of=/dev/sdb bs=16k
Plug the USB-stick into one of the USB-ports of the APU.1C4 and connect the null modem cable to the RS232-port. Then connect to the serial console with 115200 baud.
screen /dev/ttyUSB0 115200
You will see the BIOS of the APU and at some point it will ask you to hit F12 to select a boot-device. Hit F12 in the appropriate moment and choose your USB-stick as boot-media.
Disconnect from the serial console and reconnect with 9600 baud because pfSense will use 9600 baud instead of 115200 baud.
Do not interrupt the boot-process, wait until pfSense has started up, do not invoke the installer during boot up.
After pfSense has booted invoke the installer and go with the quick install option. This will give you the opportunity to choose between serial- and VGA-console (you have to choose serial here of course). If you choose the advanced install routine you will not get the chance to choose serial-console – so don’t do it.
What to do if pfSense says that it is unable to check for updates.
The situation was:
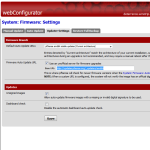
 The first thing which wasn’t correctly configured was the “Updater Settings” under “firmware” – “Updater Settings”-tab. I needed to select the “Firmware Branch” with the drop-down labeled “Default Auto Update URLs”. In my case it’s “pfSense amd64 stable updates (current architecture)” which automatically populates the “Base URL” in the “Firmware Auto Update URL”-section and also ticks “Use an unofficial server for firmware upgrades” (btw. why unofficial?).
After that, the situation was the same as above, only that I now had the Base URL “http://updates.pfsense.org/_updaters/amd64” in the Update URL text box. In the pfSense-diagnostics my pfSense-box was able to ping and traceroute “updates.pfsense.org”. I’ve been able to resolve and browse that URL from a PC behind the LAN-interface but pfSense was still complaining that it is “Unable to check for updates” at the dashboard and at the “Auto Update”-tab.
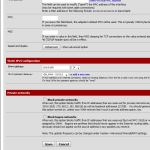
 Then I have corrected another issue at the WAN-interface configuration. Since my pfSense-box is sitting between a FritzBox and my local networks, I have unticked “Block private networks” since my gateway is in a private IP-address-range (10.0.0.X/24). I still wonder why my setup was working initially because as I understand this option, it should have blocked traffic from all private IP-ranges. I also have unticked “Block bogon networks” because (in my case) the source will allways be my FritzBox in 10.0.0.X/24.
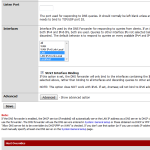
 The root of the problem was hiding in the settings for the DNS-forwarder under “Services” – “DNS-Forwarder”. Since the option “Strict Interface Binding” was selected, I had to select “localhost” under “Interfaces” for that my pfSense-box was able to resolve “updates.pfsense.org”. After that change everything was working fine and I’ve been able to run the “Auto Updater” successfully.
