postmap -q - regexp:/etc/postfix/header_checks <testmail8.txt
Renew certificates for Postfix and Courier on ISPConfig
mx1 ~ # cd /root/ssl-zertifikat/
mx1 ~/ssl-zertifikat # mkdir ./archiv/2016
mx1 ~/ssl-zertifikat # mv ./* ./archiv/2016
mx1 ~/ssl-zertifikat # openssl genrsa -des3 -out mx1.wiretrip.de.key 2048
Generating RSA private key, 2048 bit long modulus

e is 65537 (0x10001)

Enter pass phrase for mx1.wiretrip.de.key:

Verifying - Enter pass phrase for mx1.wiretrip.de.key:
mx1 ~/ssl-zertifikat # openssl req -new -key mx1.wiretrip.de.key -out mx1.wiretrip.de.csr
Enter pass phrase for mx1.wiretrip.de.key:

You are about to be asked to enter information that will be incorporated

into your certificate request.

What you are about to enter is what is called a Distinguished Name or a DN.

There are quite a few fields but you can leave some blank

For some fields there will be a default value,

If you enter '.', the field will be left blank.

-----

Country Name (2 letter code) [AU]:DE

State or Province Name (full name) [Some-State]:BY

Locality Name (eg, city) []:NUREMBERG

Organization Name (eg, company) [Internet Widgits Pty Ltd]:WIRETRIP WEB ARCHITECTURE

Organizational Unit Name (eg, section) []:IT

Common Name (e.g. server FQDN or YOUR name) []:mx1.wiretrip.de

Email Address []:----@wiretrip.de
Please enter the following ‘extra’ attributes
to be sent with your certificate request
A challenge password []:
An optional company name []:WIRETRIP WEB ARCHITECTURE
mx1 ~/ssl-zertifikat # openssl x509 -req -days 365 -in mx1.wiretrip.de.csr -signkey mx1.wiretrip.de.key -out mx1.wiretrip.de.crt
Signature ok

subject=/C=DE/ST=BY/L=NUREMBERG/O=WIRETRIP WEB ARCHITECTURE/OU=IT/CN=mx1.wiretrip.de/emailAddress=----@wiretrip.de

Getting Private key

Enter pass phrase for mx1.wiretrip.de.key
mx1 ~/ssl-zertifikat # openssl rsa -in mx1.wiretrip.de.key -out mx1.wiretrip.de.key.nopass
Enter pass phrase for mx1.wiretrip.de.key:

writing RSA key
mx1 ~/ssl-zertifikat # mv mx1.wiretrip.de.key.nopass mx1.wiretrip.de.key
mx1 ~/ssl-zertifikat # openssl req -new -x509 -extensions v3_ca -keyout cakey.pem -out cacert.pem -days 3650
Generating a 2048 bit RSA private key

writing new private key to 'cakey.pem'

Enter PEM pass phrase:

Verifying - Enter PEM pass phrase:

-----

You are about to be asked to enter information that will be incorporated

into your certificate request.

What you are about to enter is what is called a Distinguished Name or a DN.

There are quite a few fields but you can leave some blank

For some fields there will be a default value,

If you enter '.', the field will be left blank.

-----

Country Name (2 letter code) [AU]:DE

State or Province Name (full name) [Some-State]:BY

Locality Name (eg, city) []:NUREMBERG

Organization Name (eg, company) [Internet Widgits Pty Ltd]:WIRETRIP WEB ARCHITECTURE

Organizational Unit Name (eg, section) []:IT

Common Name (e.g. server FQDN or YOUR name) []:mx1.wiretrip.de

Email Address []:----@wiretrip.de
mx1 ~/ssl-zertifikat # cd /etc/postfix/
mx1 /etc/postfix # mv smtpd.cert smtpd.cert.old
mx1 /etc/postfix # mv smtpd.key smtpd.key.old
mx1 /etc/postfix # cp -a /root/ssl-zertifikat/mx1.wiretrip.de.crt ./
mx1 /etc/postfix # cp -a /root/ssl-zertifikat/mx1.wiretrip.de.key ./
mx1 /etc/postfix # chmod 600 ./mx1.wiretrip.de.key
mx1 /etc/postfix # chmod 600 ./mx1.wiretrip.de.crt
mx1 /etc/postfix # mv mx1.wiretrip.de.crt ./smtpd.cert
mx1 /etc/postfix # mv mx1.wiretrip.de.key ./smtpd.key
mx1 /etc/postfix # /etc/init.d/postfix restart
[ ok ] Stopping Postfix Mail Transport Agent: postfix.

[ ok ] Starting Postfix Mail Transport Agent: postfix.
mx1 /etc/postfix # cd /etc/courier
mx1 /etc/courier # rm -f /etc/courier/imapd.pem
mx1 /etc/courier # rm -f /etc/courier/pop3d.pem
mx1 /etc/courier # vim /etc/courier/imapd.cnf
mx1 /etc/courier # vim /etc/courier/pop3d.cnf
mx1 /etc/courier :( # rm -f /usr/lib/courier/imapd.pem
mx1 /etc/courier # rm -f /usr/lib/courier/pop3d.pem
mx1 /etc/courier # mkimapdcert
Generating a 1024 bit RSA private key

writing new private key to '/usr/lib/courier/imapd.pem'

-----

1024 semi-random bytes loaded

Generating DH parameters, 512 bit long safe prime, generator 2

This is going to take a long time

subject= /C=DE/ST=BY/L=NUERNBERG/O=WIRETRIP WEB ARCHITECTURE/OU=IT/CN=mx1.wiretrip.de/emailAddress=----@wiretrip.de

notBefore=Sep 15 14:05:59 2014 GMT

notAfter=Sep 15 14:05:59 2015 GMT
mx1 /etc/courier # mkpop3dcert
Generating a 1024 bit RSA private key

writing new private key to '/usr/lib/courier/pop3d.pem'

-----

1024 semi-random bytes loaded

Generating DH parameters, 512 bit long safe prime, generator 2

This is going to take a long time

subject= /C=DE/ST=BY/L=NUERNBERG/O=WIRETRIP WEB ARCHITECTURE/OU=IT/CN=mx1.wiretrip.de/emailAddress=----@wiretrip.de

notBefore=Sep 15 14:06:13 2014 GMT

notAfter=Sep 15 14:06:13 2015 GMT
mx1 /etc/courier # cp -a /usr/lib/courier/pop3d.pem ./
mx1 /etc/courier # cp -a /usr/lib/courier/imapd.pem ./
mx1 /etc/courier # /etc/init.d/courier-imap-ssl restart
mx1 /etc/courier # /etc/init.d/courier-pop-ssl restart
mx1 /etc/courier # /etc/init.d/courier-imap restart
mx1 /etc/courier # /etc/init.d/courier-pop restart
Thomas Krenn: Komplette Übersicht aller 3ware Ereignismeldungen
Thomas Krenn hat eine Komplettübersicht der von 3ware-RAID-Controllern geworfenen Meldungen.
http://www.thomas-krenn.com/de/wiki/Komplette_%C3%9Cbersicht_aller_3ware_Ereignismeldungen
pfSense: Install pfSense on PC Engines APU.1C4
This information is outdated. I have done a fresh install on a new device with 2.2.3 and now you have to use the installer. Boot from a USB-stick, press “I” during bootup to invoke the installer and just walk through the installation process.
How to fail and recover:
I have had some troubles to install pfSense on the new PC Engines APU.1C4. I have tried to dd the image directly to the mSATA-disk and somehow managed to wreck the BSD-disklabel by doing this.
The pfSense installer was then throwing messages like the following, stopped and threw me back to a shell.
Jul 19 10:29:17 pfsense kernel: GEOM: da1: geometry does not match label (16h,63s != 255h,63s).
I’ve been able to fix that by low level formatting the mSATA disk with the HDD LLF Low Level Formatting Tool (needs Windows) which I have found here. It did not help to just delete the partitions with gparted or fdisk or to partition and format the mSATA-disk with Windows.
How to do it right:
Prerequisites:
- USB-Stick
- USB to serial converter
- Null Modem Cable
- mSATA Disk plugged into the mSATA-port of the PC Engines APU.1C4-board
- pfSense-memstick-serial-2.1.4-RELEASE-amd64.img
Installation:
First you have to unpack the image-file.
gunzip ./pfSense-memstick-serial-2.1.4-RELEASE-amd64.img.gz
Then dd the image to the USB-stick
dd if=/path/to/pfSense-memstick-serial-2.1.4-RELEASE-amd64.img of=/dev/sdb bs=16k
Plug the USB-stick into one of the USB-ports of the APU.1C4 and connect the null modem cable to the RS232-port. Then connect to the serial console with 115200 baud.
screen /dev/ttyUSB0 115200
You will see the BIOS of the APU and at some point it will ask you to hit F12 to select a boot-device. Hit F12 in the appropriate moment and choose your USB-stick as boot-media.
Disconnect from the serial console and reconnect with 9600 baud because pfSense will use 9600 baud instead of 115200 baud.
Do not interrupt the boot-process, wait until pfSense has started up, do not invoke the installer during boot up.
After pfSense has booted invoke the installer and go with the quick install option. This will give you the opportunity to choose between serial- and VGA-console (you have to choose serial here of course). If you choose the advanced install routine you will not get the chance to choose serial-console – so don’t do it.
pfSense: “Unable to check for updates”
What to do if pfSense says that it is unable to check for updates.
The situation was:
- pfSense was throwing the error message “Unable to check for updates” at the dashboard and at the “Auto Update”-tab.
- traffic to and from the internet was passing through my pfSense-box
- DNS-resolution was working for hosts at the LAN-interface
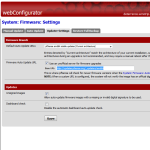
 The first thing which wasn’t correctly configured was the “Updater Settings” under “firmware” – “Updater Settings”-tab. I needed to select the “Firmware Branch” with the drop-down labeled “Default Auto Update URLs”. In my case it’s “pfSense amd64 stable updates (current architecture)” which automatically populates the “Base URL” in the “Firmware Auto Update URL”-section and also ticks “Use an unofficial server for firmware upgrades” (btw. why unofficial?).
After that, the situation was the same as above, only that I now had the Base URL “http://updates.pfsense.org/_updaters/amd64” in the Update URL text box. In the pfSense-diagnostics my pfSense-box was able to ping and traceroute “updates.pfsense.org”. I’ve been able to resolve and browse that URL from a PC behind the LAN-interface but pfSense was still complaining that it is “Unable to check for updates” at the dashboard and at the “Auto Update”-tab.
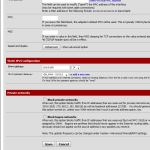
 Then I have corrected another issue at the WAN-interface configuration. Since my pfSense-box is sitting between a FritzBox and my local networks, I have unticked “Block private networks” since my gateway is in a private IP-address-range (10.0.0.X/24). I still wonder why my setup was working initially because as I understand this option, it should have blocked traffic from all private IP-ranges. I also have unticked “Block bogon networks” because (in my case) the source will allways be my FritzBox in 10.0.0.X/24.
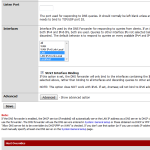
 The root of the problem was hiding in the settings for the DNS-forwarder under “Services” – “DNS-Forwarder”. Since the option “Strict Interface Binding” was selected, I had to select “localhost” under “Interfaces” for that my pfSense-box was able to resolve “updates.pfsense.org”. After that change everything was working fine and I’ve been able to run the “Auto Updater” successfully.
Fefes Blog – On the Phenomenon of Bullshit Jobs
Falls ihr noch eine Stunde Zeit habt für eine Runde Hirnwellenstimulation, habe ich noch eine Leseempfehlung: On the Phenomenon of Bullshit Jobs. Der Autor macht eine wichtige Beobachtung. Die produktiven Jobs werden der Reihe nach wegrationalisiert, aber die unproduktiven, überflüssigen Bullshit-Jobs metastasieren vor sich hin. Er meint, das würde man an sich vom Kommunismus erwarten, wo Arbeit als Pflicht und Recht zugleich gesehen wird. Der Kapitalismus als System hätte das längst alles wegrationalisieren müssen. Hat aber nicht. Warum eigentlich? Die Lektüre lohnt sich!
via Fefes Blog.
The Debian Administrator’s Handbook
Written by two Debian developers — Raphaël Hertzog and Roland Mas — the Debian Administrator’s Handbook started as a translation of their French best-seller known as Cahier de l’admin Debian published by Eyrolles. It’s a fantastic resource for all users of a Debian-based distribution. Accessible to all, this book teaches the essentials to anyone who wants to become an effective and independant Debian GNU/Linux administrator.


