I’ve made a HowTo that will guide you step-by-step through the process of setting up a SuperTuxKart Server on Debian GNU Linux 11. You can find it here.
automount CIFS share with autofs
This HowTo will prepare a Linux client to automatically mount CIFS shares from a remote Samba server on access/demand. Since I am mounting different filesystems, I have structured my mountpoints as follows:
/
├── home
│   ├── USER
│   │   ├── mnt
│   │   │   ├── cifs
│   │   │   │   ├── smb-server-a.fqdn
│   │   │   │   │   ├── share-a
│   │   │   │   │   ├── share-b
│   │   │   │   │   └── share-c
│   │   │   │   ├── smb-server-b.fqdn
│   │   │   │   │   ├── share-b
│   │   │   │   │   ├── share-b
│   │   │   │   │   └── share-c
│   │   │   ├── sshfs
│   │   │   │   ├── ssh-server-a.fqdn
From here on, I will use “mysambaserver.local” as the Samba servers FQDN, “mysambaserver” as its hostname, “myusername” as my username, “mygroup” as group and “myPassWord” as the password.
At time of writing, the server is running Ubuntu 18.04.4 LTS and the client is running Ubuntu 20.04.1 LTS.
This HowTo got compiled by trial and error and from these sources:
- https://wiki.ubuntuusers.de/Autofs/#Samba-Freigabe
- https://www.elektronik-kompendium.de/sites/raspberry-pi/2102201.htm
- https://wiki.ubuntuusers.de/Samba_Client_cifs/
- https://wiki.ubuntuusers.de/Gigolo/
- https://blog.marvin-menzerath.de/artikel/samba-freigaben-mit-autofs-automatisch-ein-aushaengen/
- https://www.howtoforge.com/accessing_windows_or_samba_shares_using_autofs
- https://wiki.samba.org/index.php/Mounting_samba_shares_from_a_unix_client
- https://kalitut.com/samba-shares-fstab/
Install Required packages, check supported filesystems
Install the required packages on the client (gigolo is just “nice to have”) and check if its kernel supports CIFS.
apt-get install autofs cifs-utils smbclient gigolo gvfs-backends gvfs-fuse fuse
ls -1 /lib/modules/$(uname -r)/kernel/fs | grep "cifs"
cifs
Check remote SAMBA connection
Check remote connection to the Samba server:
smbclient -N -L //<mysambaserver.local>/
        Sharename       Type      Comment

        ---------       ----      -------

        share-a         Disk      Share A

        share-b         Disk      Share B

        share-c         Disk      Share C

        IPC$            IPC       IPC Service (mysambaserver server (Samba, Ubuntu))

SMB1 disabled -- no workgroup available
Check authenticated login
Check an authenticated remote login. If the command line asks for a password, enter the SMB password which is configured for the user at the Samba server (via smbpasswd).
smbclient -U <myusername> -L //<mysambaserver.local>/
Enter WORKGROUP\myusername's password: [myPassWord] <--- enter the password


        Sharename       Type      Comment

        ---------       ----      -------

        share-a         Disk      Share A

        share-b         Disk      Share B

        share-c         Disk      Share C

        IPC$            IPC       IPC Service (mysambaserver server (Samba, Ubuntu))

SMB1 disabled -- no workgroup available
Create mount point
Create the mount point in the users home directory:
mkdir -pv /home/<myusername>/mnt/cifs
chown -R <myusername>:<mygroup> /home/<myusername>/mnt/
autofs configuration
The configuration consists of the master map file (/etc/auto.master), the corresponding map file (/etc/auto.mysambaserver-cifs) and the key file which contains the credentials for authentication.
In the following we will configure autofs to mount shares to /home/<myusername>/mnt/cifs/<mysambaserver.local>/<share-name>.
Map file
Create the mapfile
vim /etc/auto.<mysambaserver>-cifs
#!/bin/bash
# $Id$
# This file must be executable to work! chmod 755!
set -x
KEY="${1}"
# Note: create a cred file for each windows/Samba-Server in your network
#       which requires password authentification.  The file should contain
#       exactly two lines:
#          username=user
#          password=*****
#       Please don't use blank spaces to separate the equal sign from the
#       user account name or password.
CREDFILE="/etc/autofs/keys/${KEY}"
# # !!!!!!!!!!!!!!!!! PAY ATTENTION TO the CIFS VERSION in MOUNTOPTS !!!!!!!!!!!!!!!!!!!!!!!!!!!
# https://www.raspberrypi.org/forums/viewtopic.php?t=201727 # https://www.raspberrypi.org/forums/viewtopic.php?t=211987
# http://krisko210.blogspot.com/2016/06/autofs-automount-nfs-share.html
# Note: Use cifs instead of smbfs:
MOUNTOPTS="-fstype=cifs,file_mode=0644,dir_mode=0755,nounix,uid=1000,gid=1000"
SMBCLIENTOPTS=""
for EACH in /bin /sbin /usr/bin /usr/sbin
do
        if [ -x $EACH/smbclient ]
        then
                SMBCLIENT=$EACH/smbclient
                break
        fi
done
[ -x $SMBCLIENT ] || exit 1
if [ -e "${CREDFILE}" ]
then
        MOUNTOPTS=$MOUNTOPTS",credentials=${CREDFILE}"
        SMBCLIENTOPTS="-A "$CREDFILE
else
        SMBCLIENTOPTS="-N"
fi
$SMBCLIENT $SMBCLIENTOPTS -gL "${KEY}" 2>/dev/null \
   | awk -v key="$KEY" -v opts="${MOUNTOPTS}" -F'|' -- '
        BEGIN   { ORS=""; first=1 }
        /Disk/  { if (first) { print opts; first=0 };
                  gsub(/ /, "\\ ", $2);
                  sub(/\$/, "\\$", $2);
                  print " \\\n\t /" $2, "://" key "/" $2 }
        END     { if (!first) print "\n"; else exit 1 }
        '
chmod 755 /etc/auto.<mysambaserver>-cifs
This file is a slightly modified version of the file auto.smb which usually comes as part of the autofs package. You need to modify the line defining the mountopts above and change userid and groupid to the uid/gid of your personal account.
key file
Now you have to give autofs the credentials needed to access shares on your network. To do this create a key file
mkdir -pv /etc/autofs/keys/
vim /etc/autofs/keys/<mysambaserver.local>
username=<myusername>
password=<myPassWord>
chown root:root /etc/autofs/keys/<mysambaserver.local>
chmod 600 /etc/autofs/keys/<mysambaserver.local>
Master-Map
The maps to be monitored are specified in this file.
Execute the following command to append the line “/home/myusername/mnt/cifs /etc/auto.mysambaserver-cifs –timeout=60” at the end of the /etc/auto.master file:
echo "/home/<myusername>/mnt/cifs /etc/auto.<mysamabaserver>-cifs --timeout=60 --ghost" >>/etc/auto.master
The syntax here is: <Directory> <Map-File> [Parameter]
The shares should be unmounted after an inactivity of 60 seconds (–timeout=60) and empty directories should be created for the individual shares before mounting (–ghost).
Debugging
for debugging output stop the daemon and interactively start autofs with verbose output enabled
service autofs stop
automount -f -v
You can restart autofs with
service autofs start
Test
Use the following command to test if your setup is working
ls -als /home/<myusername>/mnt/cifs/<mysambaserver.fqdn>/<share-name>
Bookmark: Tuning dd block size
http://blog.tdg5.com/tuning-dd-block-size/
As an example of the impact that an inefficient/optimal block size can have, I’ve run a few tests for your consideration. These results are all specific to my hardware, and though they may offer a rule-of-thumb for similar situations, it’s important to keep in mind that there is no universally correct block size; what is optimal for one situation may be terribly inefficient for another.
SPF – vewy vewy special!
This code:
DOMAIN="XXX-XXXX.de"; AUTHORITATIVEDNS=$( dig SOA +noall +answer "${DOMAIN}" | awk '{print $5}' ); echo "$( dig -t TXT +noall +answer @"${AUTHORITATIVEDNS::-1}" "${DOMAIN}" | grep "v=spf1" | cut -d'"' -f2 )";has just returned that:
v=spf1 ptr +all
I don’t know what to say.
Android Apps
These are the apps which I have installed on my phone at the moment. Your suggestions for alternatives are very welcome.
What’s important for me:
- I don’t want to get ads
- I want to avoid being tracked… (yeah, I know… privacy vs. utility)
- power consumption (I kind of have given up on this point and usually have a giant powerbank and at least one USB cable with me)
- disk space
| aCalendar+ | calendar |
| AnyDesk | remote access and support |
| Asana | project management , task list, Kanban, GTD |
| Authy | two-factor authentication |
| Brave | web browser |
| CCleaner | I hope it clears the cache, I’d be interested in opinions about this app |
| Conversations | XMPP chat client |
| dandelion* | diaspora client |
| DAVx5 | CalDAV/CardDAV-client for synching calendars and contactswith Nextcloud |
| DB Navigator | timetables and tickets for trains and public transport |
| Duolingo | learning new languages |
| F-Droid | app store (Öffi, dandelion*) |
| Fing | network scanner |
| Glympse | real time position sharing |
| GoPro | camera control and configuration |
| Home | Google chrome cast control and configuration |
| Hue | control and configure Philips hue systems |
| Hue Disco | control and configure Philips hue systems |
| JB Workaround CalendarSync | I’m not sure if I still need this |
| JB Workaround ContactSync | I’m not sure if I still need this |
| JuiceSSH | SSH-client |
| K-9 Mail | e-mail client |
| Keepass2Android | password manager |
| Komoot | cycling, hiking and mountain biking maps |
| Last.fm | tracking what music I am listening to |
| Mahjong HD | a game |
| Maps | Google maps |
| Netflix | video on demand |
| News | Nextcloud news aggregator client |
| Nextcloud | Nextcloud client |
| NINA | pushes warnings from Federal Office of Civil Protection and Disaster Assistance |
| Notes | Google Keep (Notes) |
| Nova Launcher | launcher |
| Nova Launcher Prime | launcher |
| Öffi | publich transport timetables and other useful things |
| OsmAnd+ | Openstreetmap client |
| Amazon Prime Video | video on demand |
| Pushover | push notifications |
| QPython3 | Python 3 IDE |
| QuickSupport | remote access and support |
| QuickSupport Add-On Samsung | remote access and support |
| Signal | instant messenger |
| Slider Widget | control volume settings of the phone |
| Spotify | music streaming |
| Squeeze Ctrl | control Logitech Squeezeboxes |
| SSID Widget | display the SSID of the connected WIFI network |
| Street View | Google Street View |
| TeamViewer | remote control and support |
| Telegram | instant messenger |
| TeslaUnread | launcher |
| Threema | instant messenger |
| Threema QR Code Plugin | instant messenger |
| Total Commander | file manager |
| TotalCmd-FTP | file manager |
| TotalCmd-LAN | file manager |
| TotalCmd-SFTP | file manager |
| VLC | media player |
| WarnWetter | weather forecast |
| WiFiAnalyzer | WIFI scanner |
This year, it has happened!
This year, it has happened! Finally! Again!
Just in case you are wondering why I haven’t been around on steam/teamspeak for the last couple of months – Osternohe, Ochsenkopf, Klinovec.
Build a list of IP Adresses to use it for a pfSense URL Table Alias
Since AnyDesk is not willing or able to provide a list with the IP adresses of their relay hosts and I wanted to test how URL table aliases in pfSense are working I have built this nobrainoneliner which I call via cron every ten minutes.
#!/bin/bash

# Variables
ANYDESKRELAYHOSTSFILE="filename.txt";
WEBDIR="/path/to/the/directory/where/the/file/is/stored";

# Here the magic happens
dig +noall +answer relays.net.anydesk.com | awk '{print $5}' > $WEBDIR/$ANYDESKRELAYHOSTSFILE;
exit 0;
Open Hardware Monitor
The Open Hardware Monitor is a free open source software that monitors temperature sensors, fan speeds, voltages, load and clock speeds of a computer.
The Open Hardware Monitor supports most hardware monitoring chips found on todays mainboards. The CPU temperature can be monitored by reading the core temperature sensors of Intel and AMD processors. The sensors of ATI and Nvidia video cards as well as SMART hard drive temperature can be displayed. The monitored values can be displayed in the main window, in a customizable desktop gadget, or in the system tray. The free Open Hardware Monitor software runs on 32-bit and 64-bit Microsoft Windows XP / Vista / 7 / 8 / 8.1 / 10 and any x86 based Linux operating systems without installation.
simple site to site VPN with pfSense and OpenVPN
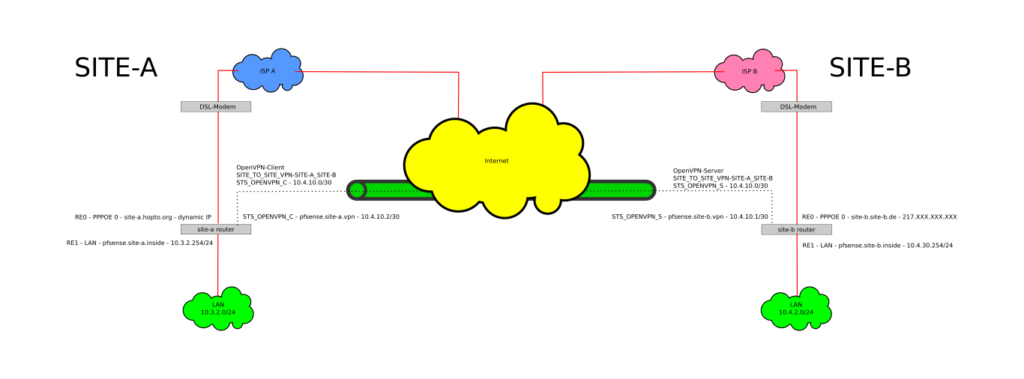
I just had to set up a simple site to site VPN between a site with a fixed IP (SITE-B) and a site with a dynamic IP (SITE-A). Both routers are running the ‘Community Edition’ of pfSense and are installed on PC Engines APU.1C4. I have followed the documentation at pfSense.org about how to configure a Site To Site VPN with OpenVPN to get the VPN up and running. Because some things aren’t documented there I will put up my own HowTo here. Please do yourself a favour and read the documentation at pfsense.org first because it explains things in more detail than I will do here.
This HowTo will guide you trough the setup of:
- An IPv4 ‘Site To Site VPN’ with OpenVPN on the pfSense platform (2.3.4 at time of writing) as seen in the schema above with the specific settings for the PC Engines APU hardware platform.
- The client will autoconnect to the server and (in the event of disconnection) reconnect automatically.
- The authentication between the client and the server will happen automatically via pre-shared key.
Sources:
Configure the OpenVPN server on SITE-B router
- Navigate to ‘VPN – OpenVPN‘
- On the ‘Servers‘-Tab click on the ‘+ Add‘-button to add a new server
- In the ‘General Information‘-section:
- Disable this server: ☐
- Server mode: Peer to Peer (Shared Key)
- Protocol: UDP
- Device Mode: tun
- Interface: set it to whatever external interface you want to have your OpenVPN server listening on. In my case this is ‘WAN‘.
- Local port: set it to the port you want the local OpenVPN server to listen on. Default is ‘1194‘.
- Description: Set an appropriate description e.g. ‘Site_To_Site-SITE-A_SITE_B‘
- In the ‘Cryptographic Settings‘-section:
- Automatically generate a shared key: ????
- Encryption Algorithm: AES-256-CBC (256 bit key, 128 bit block)
- Auth digest algorithm: RSA-SHA512 (512-bit)
- Hardware Crypto: No Hardware Crypto Acceleration (this is PC Engines APU specific, if your hardware has crypto support – enable it)
- In the ‘Tunnel Settings‘-Section:
- IPv4 Tunnel Network: 10.4.10.0/30 (this a very small subnet with 2 useable IP adresses since there is only one server and one client)
- IPv6 Tunnel Network: leave empty
- IPv4 Remote network(s): 10.3.2.0/24 (this is a comma separated list for all the networks you want to connect to on the client side (SITE A))
- IPv6 Remote network(s): leave empty
- Concurrent connections: 1
- Compression: Enabled with Adaptive Compression
- Type-of-Service: ☐ Set the TOS IP header value of tunnel packets to match the encapsulated packet value
- Duplicate Connection: ☐ Allow multiple concurrent connections from clients using the same Common Name
- Disable IPv6: ???? Don’t forward IPv6 traffic
- In the ‘Advanced Configuration‘-section:
- Custom options: leave empty
- Verbosity Level: default
- Click on ‘Save‘-button
You should now be forwarded to the list with your configured OpenVPN servers under ‘VPN – OpenVPN‘ on the ‘Servers‘-tab
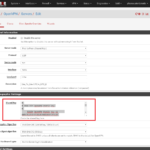
- Click on the ‘Edit‘-button (the pencil) and leave this window open because we will need to copy the ‘Shared Key‘ from this form later.
Configure the OpenVPN client on SITE-A router
- Navigate to ‘VPN – OpenVPN‘
- Click the ‘Clients‘-tab
- On the ‘Clients‘-tab click the ‘+ Add‘-button to add a new OpenVPN client
- In the ‘General Information’-section:
- Disable this client: ☐
- Server mode: Peer to Peer (Shared Key)
- Protocol: UDP
- Device mode: tun
- Interface: Set to whatever external interface you want your OpenVPN client connect to the OpenVPN server at SITE-B. In my case this is ‘WAN‘.
- Local port: leave empty
- Server host or address: Set to the FQDN or IP address of the external SITE-B Interface. In this example it is ‘site-b.site-b.de‘.
- Server port: Set to the same port you have set in the server setup at SITE-B. Default is ‘1194‘.
- : leave empty
- : leave empty
- : none
- Infinitely resolve server: ????
- Description: Set an appropriate description e.g. ‘Site_To_Site-SITE-A_SITE_B‘
- In the ‘Cryptographic Settings‘-section:
- Peer Certificate Authority: nothing to do here
- Peer Certificate Revocation list: nothing to do here
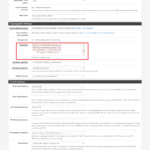
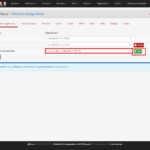
- Automatically generate a shared key: ☐ – This will display a form field in which you can paste the key from the SITE-B server configuration.
Go back to SITE-B router. If you haven’t left the window open, navigate to ‘VPN – OpenVPN‘ and select the ‘Servers‘-tab, click on the ‘Edit‘-button (the pencil) next to the server you have created earlier
- In the ‘Cryptographic Settings‘-section:
- Copy everything from the ‘Shared key‘-field into your clipboard
Return to SITE-A OpenVPN client configuration
- In the ‘Cryptographic Settings‘-section:
- Paste the contents of your clipboard into the ‘Key‘-field
- Encryption Algorithm: AES-256-CBC (256 bit key, 128 bit block)
- Auth digest algorithm: RSA-SHA512 (512-bit)
- Hardware Crypto: No Hardware Crypto Acceleration (this is PC Engines APU specific, if you have hardware crypto – enable it)
- In the ‘Tunnel Settings‘-section:
- IPv4 Tunnel Network: 10.4.10.0/30
- IPv6 Tunnel Network: leave empty
- IPv4 Remote network(s): 10.4.2.0/24 (this is a comma separated list for all the networks you want to connect to on the server side (SITE B))
- IPv6 Remote network(s): leave empty
- Limit outgoing bandwidth: Set to whatever will fit your situation
- Compression: Enabled with Adaptive Compression
- Type-of-Service: ☐ Set the TOS IP header value of tunnel packets to match the encapsulated packet value
- Disable IPv6: ???? Don’t forward IPv6 traffic
- Don’t pull routes: ☐ Bars the server from adding routes to the client’s routing table
- Don’t add/remove routes: ☐ Don’t add or remove routes automatically
- In the ‘Advanced Configuration‘-section:
- Custom options: leave empty
- Verbosity Level: default
- Click on ‘Save‘-button
Assign an interface to the OpenVPN server on SITE-B
- Navigate to ‘Interfaces – (assign)‘
You will get a list of Interfaces which has a dropdown at the bottom end which is labeled ‘Available network ports‘
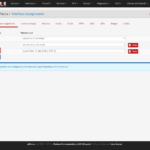
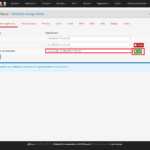
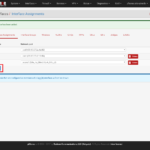
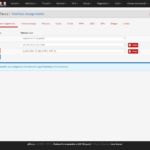
- Set ‘Available network ports‘ to ‘ovpns1 (your chosen description of your VPN)‘
- Click the ‘+ Add‘-button on the right
This will add a new Interface named ‘OPT<number>‘ to the list
- Click on ‘Save’-button
- Click on the name of the newly generated interface on the left (ususally the one with the highest trailing number)
This will open up the configuration for the interface which you have assigned to the OpenVPN server on SITE-B.
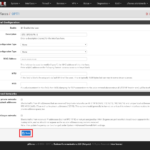
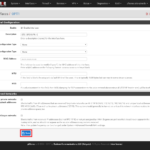
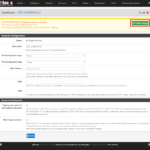
- In the ‘General Configuration‘-section
- enable interface: ????
- Description: STS_OPENVPN_S
- IPv4 Configuration Type: leave empty
- IPv6 Configuration Type: leave empty
- MAC Address: leave empty
- MTU: leave empty
- MSS: leave empty
- In the ‘Reserved Networks‘-section:
- Block private networks and loopback addresses: ☐
- Block bogon networks: ☐
- Click on ‘Save‘-button
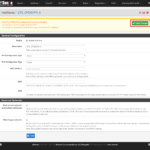
- Click on ‘Apply Changes‘
Assign an interface to the OpenVPN client on SITE-A
- Navigate to ‘Interfaces – (assign)‘
You will get a list of Interfaces which has a dropdown at the bottom end which is labeled ‘Available network ports‘
- Set ‘Available network ports‘ to ‘ovpnc1 (your chosen description of your VPN)‘
- Click the ‘+ Add‘-button on the right
This will add a new Interface named ‘OPT<number>‘ to the list
- Click on ‘Save’-button
- Click on the name of the newly generated interface on the left (ususally the one with the highest trailing number)
This will open up the configuration for the interface which you have assigned to the OpenVPN server on SITE-B.
- In the ‘General Configuration‘-section
- enable interface: ????
- Description: STS_OPENVPN_C
- IPv4 Configuration Type: leave empty
- IPv6 Configuration Type: leave empty
- MAC Address: leave empty
- MTU: leave empty
- MSS: leave empty
- In the ‘Reserverd Networks‘-section:
- Block private networks and loopback addresses: ☐
- Block bogon networks: ☐
- Click on ‘Save‘-button
- Click on ‘Apply Changes‘
Firewall rules on SITE-B router
Now, to allow traffic to the OpenVPN server, a rule has to be added to the firewall on SITE-B router .
- Navigate to ‘Firewall – Rules‘
- Select the ‘WAN‘-tab
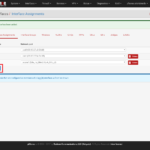
- Click the left ‘Add‘-button to add a rule to the top of the list
- In the ‘Edit Firewall Rule‘-section:
- Action: Pass
- Disable this rule: ☐
- Interface: WAN
- Address Family: IPv4
- Protocol: UDP
- In the ‘Source‘-section:
- Invert match:
- Dropdown: any
- In the ‘Destination‘-section:
- Invert match: ☐
- Dropdown: WAN address
- Destination Port Range: select OpenVPN (1194) in the left dropdown (that will also set the other dropdown to the same option
- In the ‘Extra Options‘-section:
- Log packets that are handled by this rule: ☐
- Description: Set an appropriate description like ‘ALLOW ANY to WAN ADDRESS:1194 (OpenVPN – SITE-A/SITE-B)‘
- Click the ‘Save‘-button
- Click ‘Apply Changes‘
Then add a firewall rule to allow traffic to pass through the tunnel.
- Stay at ‘Firewall – Rules‘
- Select the ‘OpenVPN‘-tab
- Click the left ‘Add‘-button to add a rule to the top of the list
- In the ‘Edit Firewall Rule‘-section:
- Action: Pass
- Disable this rule: ☐
- Interface: OpenVPN
- Address Family: IPv4
- Protocol: Any
- In the ‘Source‘-section:
- Invert match: ☐
- Dropdown: any
- In the ‘Destination‘-section:
- Invert match: ☐
- Dropdown: any
- In the ‘Extra Options‘-section:
- Log: ☐ Log packets that are handled by this rule
- Description: Set an appropriate description like ‘ALLOW ANY TO ANY on OPENVPN‘
- Click the ‘Save‘-button
- Click ‘Apply Changes‘
Firewall rule on SITE-A router
On SITE-A router a firewall rule to allow traffic to pass through the tunnel has to be added.
- Navigate to ‘Firewall – Rules‘
- Select the ‘OpenVPN‘-tab
- Click the left ‘Add‘-button to add a rule to the top of the list
- In the ‘Edit Firewall Rule‘-section:
- Action: Pass
- Disable this rule: ☐
- Interface: OpenVPN
- Address Family: IPv4
- Protocol: Any
- In the ‘Source‘-section:
- Invert match: ☐
- Dropdown: any
- In the ‘Destination‘-section:
- Invert match: ☐
- Dropdown: any
- In the ‘Extra Options‘-section:
- Log: ☐ Log packets that are handled by this rule
- Description: Set an appropriate description for the rule like ‘ALLOW ANY TO ANY on OPENVPN‘
- Click the ‘Save‘-button
- Click ‘Apply Changes‘
Restart OpenVPN service at SITE-B
- Navigate to ‘Status – OpenVPN‘
- In the ‘Peer to Peer Server Instance Statistics‘-section:
- Find the entry named ‘Site_To_Site-SITE-A_SITE_B UDP:1194‘ and click the ‘Restart openvpn Service‘-icon in the ‘Service‘-column
Restart OpenVPN service at SITE-A
- Navigate to ‘Status – OpenVPN‘
- In the ‘Client Instance Statistics‘-section:
- Find the entry named ‘Site_To_Site-SITE-A_SITE_B UDP‘ and click the ‘Restart openvpn Service‘-icon in the ‘Service‘-column
additional postfix filter for fail2ban
My fail2ban-setup was missing a filter for a certain type of attack which has a different “_daemon”-string
[postfix-sasl2]
enabled  = true
banaction = iptables-allports
protocol  = all
port      = anyport
filter   = postfix-sasl2
logpath  = /var/log/mail.log
maxretry = 3
# Fail2Ban filter for postfix authentication failures
#

[INCLUDES]

before = common.conf

[Definition]

_daemon = postfix/smtps/smtpd

failregex = ^%(__prefix_line)swarning: [-._\w]+\[<HOST>\]: SASL (?:LOGIN|PLAIN|(?:CRAM|DIGEST)-MD5) authentication failed(: [ A-Za-z0-9+    /]*={0,2})?\s*$

# Author: Yaroslav Halchenko
ignoreregex =


